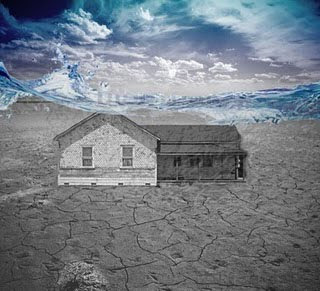
To create this image, I began by sarting to colect and select. I looked on various texture and stock websites and found the images I needed. I opened up the backround and started using my protocols to clean up the image, then took the image from being an RGB to a greyscale. I then edited the sky and clouds using the dodge and burn tools, and brought the colour back and used the saturation and levels tool to get a more dramatic colour. After that I cropped and trimmed the house using the eraser and added it into the photo. I used my protocols to even out of image colour to blend into the backround. I put it centered and blended around the trim to soften the edges. Then I did the same with the water, and sharpened the water movement. Then I added a water texture underneath the water wave after taking out the colour and turned down the opacity. To finish off, I burned the edges to make a darkening effect and flattened the whole thing to complete it.
Monday, January 17, 2011
Final exam project; Jan. 17/ 2010
To create this image, I began by sarting to colect and select. I looked on various texture and stock websites and found the images I needed. I opened up the backround and started using my protocols to clean up the image, then took the image from being an RGB to a greyscale. I then edited the sky and clouds using the dodge and burn tools, and brought the colour back and used the saturation and levels tool to get a more dramatic colour. After that I cropped and trimmed the house using the eraser and added it into the photo. I used my protocols to even out of image colour to blend into the backround. I put it centered and blended around the trim to soften the edges. Then I did the same with the water, and sharpened the water movement. Then I added a water texture underneath the water wave after taking out the colour and turned down the opacity. To finish off, I burned the edges to make a darkening effect and flattened the whole thing to complete it.
Subscribe to:
Post Comments (Atom)
No comments:
Post a Comment